Monday, May 8, 2017

Planting Instructions


1.  Dig your planting hole the same depth as your pot and twice as wide as your pot.
2.  The way you prepare the plant depends on what you find inside the pot.  We'll go over that, below, with photos.

Our goal is to encourage the plant to extend its roots into your garden soil as soon as possible.  This is because the potting mix it is currently growing in was designed to drain water very rapidly so that it could survive living in a plastic pot.  After planting, the water drains even more rapidly out of that potting mix into the real soil and your new plants could be in a tiny desert until they are able to reach that real (water holding) soil.  Below, you'll see how we recommend planting based on the condition of your new plant's roots.

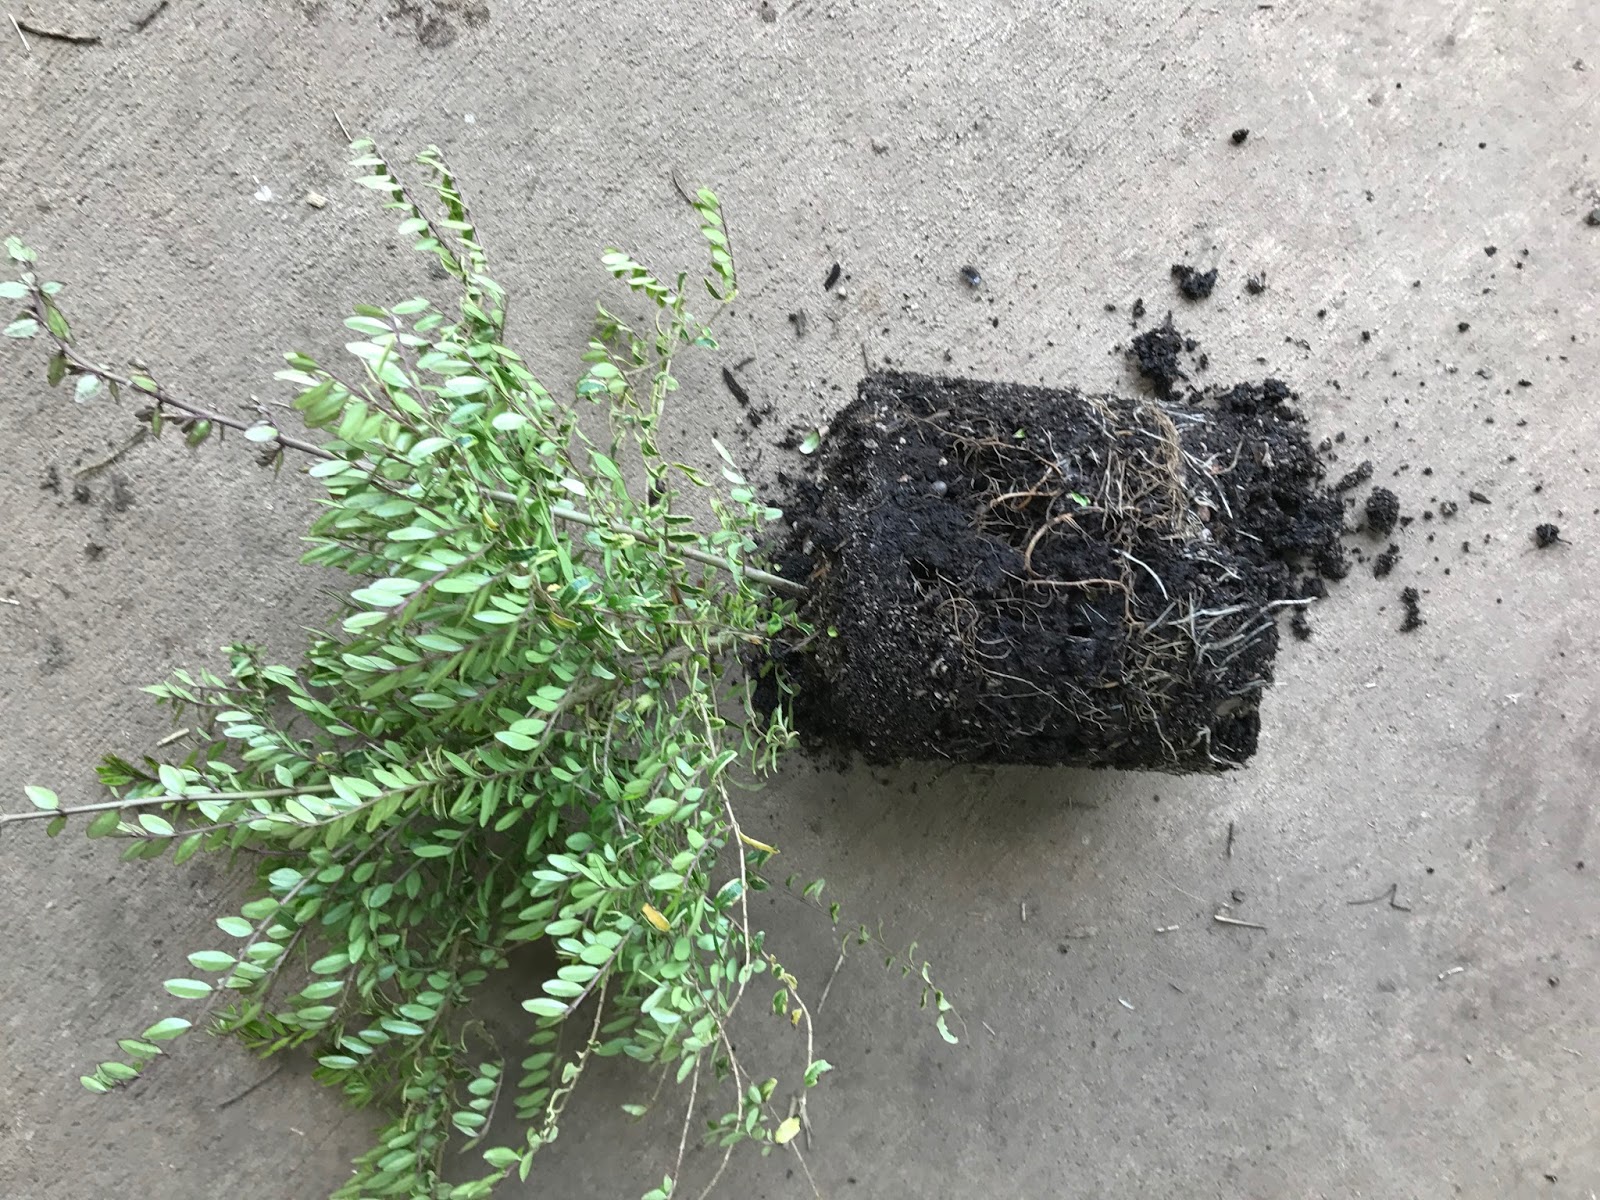
Newly potted -

  
This plant has not grown into it's pot thoroughly yet.  Much of the  potting mix has still not been reached, let alone held together by roots.  You have two options - Option 1. Set aside the loose potting mix and pot the plant with it's small root ball.  This plant will need careful attention to how much water is in the potting mix.  The only way to know for sure is to feel an inch or two down in the soil with a finger which would ideally be done twice a week for the first couple of months.  If it's dry an inch down, water right away. Option 2. Carefully repot the plant and keep it somewhere easy to watch over while it grows a bit more.  In Western Oregon, it's best for plants to be planted well before hot weather comes though, so this time of year, you might wait for fall if you're going to wait at all.


Just right - 

This plant is very lucky.  It's being planted at an ideal time because it has many roots poised and ready to grow into the soil asap, but nothing is circling much or bound up.  Nothing needs to be done beyond a bit of very gentle loosening around the edges.

Slightly pot bound -
This plant needs a little help getting out into the soil, but it will be very happy and establish quickly.  Firmly loosen the roots, breaking as few as you can.  Some will break, but that is much better than circling around or staying stuck together.  See photos below for a demonstration.
Now the loosened roots will immediately have access to water and nutrient rich soil.


Badly pot bound -  

This plant needs help and drastic measures are called for.    The roots are too tightly bound to be able to be loosened so they must be cut.  We will discuss two options.
Option 1 - Butterflying. You would use a saw or knife to split the root mass all the way across the bottom and halfway up.    Then loosen the roots as best you can.  The demonstration plant needed more help than that, so, in this case, option 2 was the best way to go.

Option 2 - Box cut.  Use a saw or knife to shave off most of the bound up roots that were touching the edge of the pot.   Repeat 4 times creating 4 sides.  The bottom also needs to be
 either shaved off or cut and loosened.
This is what your plant should look like from above when you are finished - a box with rounded corners.  
 
3.  Set your plant in the ground so that it's soil level is the same as the ground around it or even a little high.  If the crown gets too low, it's more likely to suffer from problems with rot.
4.  Refill the hole with only the soil you took out unless it is terribly rocky or otherwise grossly unsuitable.
5.  Optional - sprinkle compost on top of the soil.  Also optional - sprinkle a small amount of soil on top of the potting mix.  If a little soil washes down into the potting mix, it will hold a bit more water.
6.  Water thoroughly. 
7.   Optional, but highly recommended  - mulch with 2-5 inches of organic mulch, such as wood chips, leaves, bark, or grass clippings (with NO chemical herbicides, including weed and feed).  This retains moisture, benefits soil structure, and suppresses weeds.
8.  Most plants will need regular watering through at least their first summer, even if they are typically drought resistant once established.  Don't over water, either, though.  For most plants, allow the soil to dry an inch or two down before watering again.  Test with your finger or take a peak with a small trowel.  It's important to check beneath the surface often.

Happy Gardening Everyone!


Friday, April 28, 2017

Open plots in Dunawi Creek Community Garden

Dunawi Creek Community Garden, located in Starker Arts Park, still has a few open plots available for 2017. To find out more, visit www.corvallisenvironmentalcenter.org/eci/communitygardens/ or email SAGE@corvallisenvironmentalcenter.org


Saturday, April 22, 2017

Link to Fascinating Article from the New York Times

Click here to read the article: Tomatillo Fossils, 52 Million Years Old, Are Discovered in Patagonia


Fossilized tomatillos.  Photo credit - Nicholas St. Fleur
For those of you who might be interested in growing your own tomatillos, they will be available at the Master Gardener plant sale on May 6th at the Benton County Fairgrounds beginning at 9:00.  Come early, some of the plants sell out fast.

Tuesday, April 18, 2017

A CBUF Guide to Caring for Your Trees

About your new trees:
A CBUF* guide to caring for your street trees
*Civic Beautification and Urban Forestry advisory committee
The first part has been completed and your new trees are in the ground. If you do the following you can insure that your trees will survive and thrive.
Water: Later in the spring city parks staff will attach water bags to your tree. All you need to do is fill the bags up once per week starting in May and continuing through Labor Day. Research shows that trees that are watered regularly for the first three summers after planting have better growth and survival than trees that are not watered. By the end of the third summer the city staff will remove the water bags and you can let the trees fend for themselves.
Water bags are pretty tough but they do need some maintenance. They are designed with tiny holes in the base of the bag to allow water to ooze out over a period of hours. Often by the end of summer algae growth inside the bag may plug the holes and water will not empty out of the bag. If this happens you can poke three or four new holes in the bottom of the bag using a small diameter nail. 
Water bags sometimes develop unwanted holes and lose water too fast. If you see large leaks they can be sealed reasonably well by applying duct tape over the leaky spot. Make sure the bag surface is clean and dry before applying the tape.


Water bags hold about 20 gallons of water. Place a hose in the slit at the top of the bag and let it run until the bag overflows.
Weekly watering from Memorial Day through Labor Day is the goal. If you forget to water just start again when you remember.
In very dry springs and the first spring after planting, you may have to start watering in early May.


Mulch and weed: At the time of planting, the trees are mulched with wood chips to help conserve soil moisture and allow early root growth to occur without competition from grass. The mulch zone also prevents trunk damage from lawnmowers that may collide with your trees.
Your job is to maintain a grass free zone, three feet in diameter or larger, for the first three years. Regular mulching will help but hand weeding will likely be necessary at least once per year. It’s okay to apply 3” thick mulch every year but be careful not to pile mulch right at the base of the tree trunk.
If you fail to keep up with mulching and hand weeding and the grass grows around the tree trunk do not use a weed eater to remove the grass because the strings will damage the vascular tissue located just beneath the thin bark of the young trees. This will stunt tree growth and may even kill the tree if the entire stem is girdled.  Hand weeding is the preferred way to remove grass around the base of the trunk.
If you choose to apply a non-selective herbicide to kill unwanted grass, be sure to follow label directions exactly and avoid directly spraying the base of the tree trunk.


A 3-4” mulch of bark or wood chips and periodic weeding will keep the area around the base of the tree weed free. It will also create a buffer zone to keep lawnmowers from running into the trunk.


Once grass grows right up to the tree trunk, the best way to remove it is by hand. Avoid using a string trimmer because it will damage the vascular tissue located beneath the bark and stunt tree growth or even kill the tree.


Keep an eye out for problems: Inspect your trees periodically to make sure they are healthy. If damage occurs from disease, insects, or vandalism contact the city arborist and a staff member will come out to check on your tree. Occasionally, new trees fail to leaf out or die shortly after leafing out during the first spring. If you notice this please contact the city arborist so arrangements can be made to replace the tree.

Feel free to contact your Corvallis City Forester if you have any questions or concerns: 
Jon Pywell (541-754-1723), Jonathan.Pywell@corvallisoregon.gov